

Introduction
There is a profound, undeniable magic that happens when rich, dark chocolate meets the bold, roasted notes of premium coffee. If you have ever wondered does espresso make chocolate taste better, the answer is a resounding yes. The pairing elevates ordinary baked goods into extraordinary, gourmet creations. These incredibly decadent espresso brownies are the ultimate testament to that flavor pairing. Crafted for true dessert aficionados, this best espresso brownie recipe delivers an intensely chocolatey experience with a sophisticated coffee finish that lingers beautifully on the palate.
Whether you call them coffee brownies or mocha brownies, the goal is exactly the same: achieving a dense, melt-in-your-mouth texture that rivals your favorite bakery. By utilizing a technique that involves browning butter for brownies and whisking eggs to create a paper-thin, glossy crust, we achieve a dessert that is visually stunning and texturally flawless. If you are searching for an easy espresso brownies tutorial that yields professional results, you are in the right place. Step into the kitchen, grab your whisk, and let’s create the most spectacular fudgy espresso brownies you will ever taste.
 Recipe")
Before we dive straight into the recipe card, we need to talk about the secret to unlocking that deep, bakery-style flavor. The key lies in understanding exactly what kind of coffee to use—because when it comes to choosing the best espresso powder for baking, quality matters. In the sections below, I’ll walk you through my top expert baking tips, including how to perfectly balance your wet and dry ingredients to guarantee those coveted, chewy edges and a gooey, truffle-like center. Keep reading to discover the essential pantry staples and the fail-proof step-by-step method that will make these rich homemade chocolate desserts your new go-to signature bake.
Why You Will Love This Recipe
- Intense Flavor Profile: The addition of espresso powder naturally amplifies the depth of the cocoa, creating robust, complex chocolate espresso brownies without an overwhelming bitter aftertaste.
- Truffle-Like Texture: Forget dry, cakey crumb structures. This recipe guarantees gooey coffee brownies that are thick, rich, and intensely moist in the center.
- That Signature Shiny Crust: By vigorously whipping the eggs and granulated sugar, you will easily achieve that highly sought-after, paper-thin crinkly top that makes espresso brownies from scratch look professionally made.
- Gourmet Yet Accessible: Even though these brown butter espresso brownies taste like they came from a high-end French patisserie, they are surprisingly simple to assemble. This is a genuinely foolproof fudgy brownies recipe perfect for bakers of any skill level.
- No Mixer Required: While a stand mixer can speed up the egg-whisking process, this simple coffee brownie recipe can easily be made entirely by hand with a good whisk and a bit of arm strength.
 Recipe")
What Makes This Recipe Special
While there are countless recipes for standard chocolate baked goods, these fudgy espresso brownies stand entirely in a league of their own. The secret lies in a carefully balanced trio of flavor-enhancing ingredients: browned butter, high-quality semi-sweet chocolate chips, and rich dark cocoa powder.
When you take the time for browning butter for brownies, you introduce deep, toasted, nutty notes that beautifully complement the roasted flavor profile of the coffee. Furthermore, by melting actual semi-sweet chocolate chips directly into that hot butter, we create a dense, luxurious base that cocoa powder alone simply cannot provide. This dual-chocolate approach, combined with a generous dose of premium espresso powder for baking brownies, guarantees an unforgettable depth of flavor that a boxed mix could never replicate.
Taste and Texture
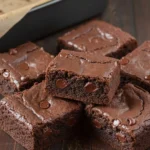
The eating experience of these chewy espresso brownies is an exercise in absolute decadence. When you take your first bite, your teeth will break through a delicate, glass-like, crinkly top crust that shatters beautifully. Immediately beneath that crisp exterior lies the heart of the brownie: a remarkably dense, truffle-like center that is heavy, moist, and undeniably rich.
Flavor-wise, the initial taste is pure, unadulterated dark chocolate. As the brownie melts on your tongue, the intricate background notes begin to emerge. You will notice the toasted caramel warmth of the browned butter, followed by a robust, earthy finish from the coffee. The coffee flavor is prominent but perfectly balanced, ensuring these remain distinctively chocolate espresso brownies rather than a dessert that tastes entirely like a cup of black coffee. The edges bake up perfectly chewy, providing a delightful textural contrast to the soft, gooey coffee brownies center.
 Recipe")
Ingredients
- 1 cup unsalted butter: Cut into pieces for even melting and browning.
- 1 cup + 2 tablespoons semi-sweet chocolate chips: Use high-quality chips or a chopped baking bar for the best melting consistency.
- 1 ¼ cups granulated sugar: Essential for sweetness, moisture, and creating the glossy top crust.
- 3 large eggs: Must be at room temperature to properly aerate when whisked.
- 1 cup all-purpose flour: Measured correctly to prevent dense, dry results.
- 3 tablespoons dark cocoa powder: Dutch-processed cocoa provides a much richer color and smoother flavor than standard natural cocoa.
- 2 tablespoons espresso powder: Instant espresso powder for baking brownies dissolves beautifully and packs a concentrated flavor punch.
- ½ tablespoon pure vanilla extract: Enhances the chocolate and coffee notes.
- ½ teaspoon kosher salt: Crucial for balancing the sweetness and amplifying the overall flavor profile.
If you need to convert ingredient measurements, adjust baking temperatures, or switch between US and metric units, use our complete baking measurement conversion calculator.
 Recipe")
Optional Add-Ins and Substitutions
- Chopped Nuts: Fold in ¾ cup of toasted walnuts, pecans, or hazelnuts for an added earthy crunch that pairs wonderfully with mocha brownies.
- Chocolate Chunks: For even more decadence, fold in a half cup of dark or milk chocolate chunks right before baking.
- Sea Salt Flakes: Sprinkle flaky sea salt over the top of the batter right before the pan goes into the oven to contrast the sweetness of the fudgy espresso brownies.
- Instant Coffee: If you cannot find high-quality espresso dust, you can use instant coffee granules. However, you may need to crush them into a finer powder first, and the flavor will be slightly less intense.
- Salted Butter: If you only have salted butter on hand, you can easily use it. Just omit the additional ½ teaspoon of kosher salt called for in the recipe to avoid over-salting your coffee brownies.
 Recipe")
Baking Science Behind This Recipe
Understanding the science behind how to make espresso brownies will make you a far better baker. The process begins with the Maillard reaction. By melting and cooking the butter until the milk solids toast and caramelize, we create browned butter, which contains hundreds of new, complex flavor compounds that regular melted butter lacks.
Next, we rely on the heat of that freshly toasted butter to melt our semi-sweet chocolate chips. This gentle melting process ensures the cocoa butter in the chocolate remains smooth and emulsified. If you are wondering how to melt chocolate for brownies without seizing it, utilizing the residual heat of hot butter is one of the most reliable methods in pastry arts.
Additionally, the hot butter mixture gently warms the dark cocoa powder and espresso powder. This heat triggers a process called blooming cocoa powder, which releases trapped flavor oils and intensifies both the chocolate and coffee aromas significantly.
Finally, the signature glossy, crinkly crust is purely a result of egg aeration. By vigorously whisking the room-temperature eggs with the granulated sugar, you dissolve the sugar crystals into the egg whites, creating a very delicate foam. During baking, this foam rises to the surface, dries out, and sets into the beautiful, delicate meringue-like crust that defines the best espresso brownie recipe.
How to Make It
Step 1: Brown the Butter
Place the sliced unsalted butter into a light-colored or stainless steel saucepan over medium heat. Allow the butter to melt, stirring occasionally. It will begin to sizzle, pop, and foam up significantly. Continue to cook and stir until the popping subsides, the foam clears slightly, and you see golden-brown specks collecting at the bottom of the pan. The aroma will suddenly smell incredibly nutty. Immediately remove the pan from the heat.
Why it matters: Browning the butter evaporates its water content and toasts the milk solids, removing excess moisture from the batter and adding a gourmet caramel-like flavor.
 Recipe")
Step 2: Melt the Chocolate
Immediately pour the hot browned butter—making sure to scrape every single brown toasted speck from the bottom of the pan—into a large heat-proof mixing bowl. Add the semi-sweet chocolate chips directly into the hot liquid. Let the mixture sit completely undisturbed for one full minute to allow the heat to penetrate the chocolate, then gently whisk until the mixture is completely smooth, dark, and glossy. Set this aside to cool slightly.
Why it matters: This method is the safest and most efficient way regarding how to melt chocolate for brownies, preventing the risk of scorching the chocolate over direct heat.
 Recipe")
Step 3: Whisk the Eggs and Sugar
In a separate large mixing bowl, combine the room-temperature eggs, granulated sugar, and vanilla extract. Using a hand mixer or a vigorous hand whisk, beat the mixture for roughly 2 to 3 full minutes on medium-high speed. The mixture should dramatically lighten in color, double in volume, and become thick and frothy.
Why it matters: This heavy aeration dissolves the sugar and creates the delicate meringue foam required for the shiny, crinkly top crust on your espresso brownies.
 Recipe")
Step 4: Combine Wet Ingredients
While continuously whisking the aerated egg and sugar mixture on low speed, slowly stream in the slightly cooled melted chocolate and butter mixture. Continue to mix just until the two liquids are fully combined into a homogeneous, dark brown batter.
Why it matters: Slowly streaming the warm chocolate prevents the eggs from scrambling, effectively tempering the mixture.
 Recipe")
Step 5: Fold in the Dry Ingredients
In a small bowl, whisk together the all-purpose flour, dark cocoa powder, espresso powder, and kosher salt. Pour this dry mixture into the wet batter. Using a rubber spatula, gently fold the ingredients together using a sweeping “J” motion, scraping the bottom and sides of the bowl. Stop folding the absolute second you no longer see streaks of dry flour.
Why it matters: Overmixing the flour will develop too much gluten, transforming your fudgy espresso brownies into tough, rubbery cakes.
 Recipe")
Step 6: Bake and Cool
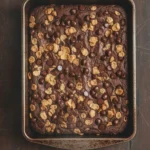
Pour the batter into a metal 8×8-inch baking pan that has been lined with parchment paper, allowing excess paper to hang over the edges for easy removal. Smooth the top with your spatula. Bake in a preheated 350°F (175°C) oven for 28 to 35 minutes. Remove the pan from the oven and place it on a wire cooling rack. Allow the brownies to cool completely in the pan before attempting to lift them out and slice them.
Why it matters: Metal pans conduct heat efficiently for perfect chewy edges. Cooling completely allows the residual heat to finish setting the dense center.
 Recipe")
Baking Tools and Equipment
- Light-Colored Saucepan: Essential for monitoring the color change while browning butter. Dark non-stick pans make it very difficult to see when the milk solids have perfectly toasted.
- Digital Kitchen Scale: The most accurate way to measure flour and cocoa powder to guarantee perfectly fudgy espresso brownies every single time.
- Metal 8×8-Inch Baking Pan: Aluminum or light metal pans conduct heat evenly, ensuring the corners do not overbake before the center sets.
- Parchment Paper: Prevents sticking and allows you to easily lift the entire block of coffee brownies out of the pan for clean slicing.
- Heavy-Duty Whisk or Hand Mixer: Necessary for properly aerating the eggs and sugar to achieve the crinkly crust.
Each baking tool listed above was carefully selected for consistent results. Click any product name to explore trusted kitchen essentials.
 Recipe")
How to Know It Is Done
When it comes to testing brownies for doneness, traditional cake rules do not apply. If you insert a toothpick into the center of these chocolate espresso brownies and it comes out completely clean, you have overbaked them, and they will be dry.
Instead, look for visual and physical cues. The edges should appear fully set and slightly separated from the parchment paper. The top should be completely covered in a dull, crinkly crust. When you insert a toothpick exactly into the center, it should come out coated in thick, moist, gooey crumbs—but not wet, runny batter. Remember that the easy espresso brownies will continue to bake and firm up in the hot metal pan for at least 30 minutes after being removed from the oven. Pulling them out while they still look slightly underdone in the absolute center is the key to achieving that signature fudge texture.
Common Mistakes to Avoid
- Using a Glass Baking Dish: Glass acts as an insulator rather than a conductor. It takes much longer to heat up, which often results in chewy espresso brownies that are burnt on the edges and raw in the middle. Always stick to metal pans.
- Overbaking: This is the most common reason for dry, disappointing desserts. Trust the timing, and pull the pan from the oven when moist crumbs still cling to your toothpick.
- Skipping the Egg Whisking: If you lazily stir the eggs and sugar together, your brown butter espresso brownies will taste fine, but they will have a dull, flat, porous top instead of a shiny, glass-like crust.
- Slicing While Hot: Cutting into gooey coffee brownies straight from the oven will cause them to collapse into a messy, molten pile. You must let them cool completely at room temperature so the cocoa butter and standard butter can solidify and set the structure.
- Using Old Espresso: Ground coffee and espresso lose their volatile flavor oils over time. Using stale ingredients will result in a lack of depth, defeating the purpose of making espresso brownies from scratch.
Storage and Freezing
- Room Temperature: Store leftover completely cooled espresso brownies in an airtight container at room temperature for up to 3 to 4 days. Keeping them tightly sealed prevents them from drying out and maintains their chewy edges.
- Refrigeration: If you prefer ultra-dense, cold, truffle-like treats, you can store them in the refrigerator for up to a week.
- Freezing: This is a wonderfully freezer-friendly dessert. Wrap individual squares tightly in plastic wrap, then place them inside a heavy-duty freezer bag. Freeze for up to 3 months. Thaw frozen coffee brownies at room temperature for a few hours before eating, or warm them in the microwave for 15 seconds.
 Recipe")
Flavor Variations
- Peppermint Mocha Brownies: Add ½ teaspoon of pure peppermint extract to the batter along with the vanilla for a holiday-inspired twist on classic mocha brownies.
- Caramel Macchiato Brownies: Drizzle ribbons of thick, salted caramel sauce over the top of the batter in the pan, and use a butter knife to gently swirl it in before baking.
- White Chocolate Espresso: Fold in 1 cup of high-quality white chocolate chips. The creamy, milky sweetness of the white chocolate beautifully offsets the bitter, roasted notes of the espresso powder.
- Spiced Mexican Coffee Brownies: Add 1 teaspoon of ground cinnamon and a ¼ teaspoon of cayenne pepper to the dry ingredients for a complex, warming heat that pairs gorgeously with the dark chocolate.
Expert Tips
- Always Weigh Your Flour: The number one reason foolproof fudgy brownies turn out cakey and dry is using too much flour. If you do not have a kitchen scale, use a spoon to fluff your flour in its container, gently spoon it into your measuring cup, and level it off with a knife. Never scoop directly with the cup.
- Use High-Quality Chocolate: Because this simple coffee brownie recipe relies heavily on melted chocolate for its base structure, the quality of the chips or baking bar you choose will directly dictate the final flavor. Opt for a premium brand containing real cocoa butter.
- Clean Slices: To get pristine, bakery-style squares with perfectly sharp edges, chill the entire pan in the refrigerator for one hour before slicing. Use a large, sharp chef’s knife, and wipe the blade completely clean with a warm, damp paper towel between every single cut.
- Enhancing the Coffee: For an even deeper flavor, try replacing the vanilla extract with an equal amount of pure coffee extract.
Frequently Asked Questions
1. Can you put espresso in brownies?
Yes, absolutely! Adding coffee or espresso to chocolate baked goods is a classic culinary technique. The roasted, slightly bitter notes of the coffee bean naturally enhance and deepen the flavor profile of the cocoa bean. You can use instant granules, but utilizing fine espresso powder for baking brownies ensures it dissolves flawlessly into the batter without leaving gritty chunks, resulting in smooth, luxurious fudgy espresso brownies.
2. How much espresso powder to add to brownies?
The amount you use depends entirely on your desired outcome. If your goal is simply to amplify the chocolate flavor without making the dessert taste like coffee, 1 teaspoon is sufficient. However, for a true best espresso brownie recipe where the coffee flavor takes center stage alongside the chocolate, 2 full tablespoons of high-quality powder is the ideal amount to achieve robust, distinct chocolate espresso brownies.
3. Does espresso make chocolate taste better?
Yes, it does. Coffee and chocolate share many similar flavor compounds and flavor profiles. When introduced to chocolate, the complex bitterness of the coffee acts much like salt does in a savory dish—it enhances, lifts, and rounds out the existing flavors. This synergy is why mocha brownies and chocolate coffee cakes are universally beloved in the pastry world.
4. Can I use regular cocoa powder instead of dark cocoa powder?
You can, but it will change the final result. Dark cocoa powder is heavily Dutch-processed, meaning it has been treated with an alkalizing agent to neutralize its natural acidity. This results in a smoother, mellower flavor and a beautifully dark, almost black color. Standard natural cocoa powder is more acidic, lighter in color, and sharper in taste. For the richest coffee brownies, Dutch-processed is highly recommended.
Related Recipes From Our Kitchen
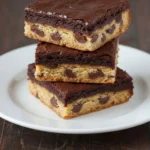
- Brookies (Brownie Cookies) Recipe: Get the best of both worlds with a thick, chewy chocolate chip cookie layer baked directly on top of a rich fudge brownie base.
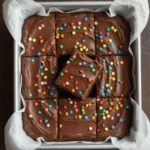
- Cosmic Brownies Recipe: A nostalgic, ultra-fudgy copycat recipe topped with a rich chocolate ganache and those iconic colorful candy-coated chocolate chips.
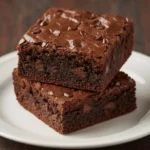
- Fudgy Homemade Brownies: Our classic, highly-rated recipe for traditional chocolate lovers who prefer a dense, crinkly-topped dessert without the addition of coffee.
- Homemade Brownie Recipe: A simple, straightforward, cocoa-based baked treat that is perfect for whipping up on a weeknight when the chocolate cravings hit hard.
Final Notes
Mastering the art of how to make espresso brownies is a true joy that will reward you, and anyone lucky enough to share your kitchen, time and time again. By taking the few extra minutes to deeply toast the butter, melt the chocolate gently, and aerate the eggs until they are perfectly pale and fluffy, you elevate standard ingredients into a world-class dessert. These dense, intensely flavored squares prove that baking from scratch is always worth the effort. Enjoy the process, savor the incredible aromas that will fill your home, and take pride in knowing you have just created the ultimate gourmet chocolate treat. Happy baking!
 Recipe")
The Ultimate Fudgy Espresso Brownies
Ingredients
Equipment
Method
- Place the sliced unsalted butter into a light-colored or stainless steel saucepan over medium heat. Melt and cook, stirring occasionally, until the popping subsides and golden-brown specks collect at the bottom. Remove from heat immediately once it smells nutty.
- Pour the hot browned butter, including all the toasted brown specks, into a large heat-proof mixing bowl. Add the semi-sweet chocolate chips directly into the hot liquid. Let sit completely undisturbed for one minute, then gently whisk until completely smooth, dark, and glossy. Set aside to cool slightly.
- In a separate large mixing bowl, combine the room-temperature eggs, granulated sugar, and vanilla extract. Beat using a hand mixer or heavy-duty whisk for 2 to 3 minutes on medium-high speed until the mixture lightens in color, doubles in volume, and becomes thick and frothy.
- While continuously whisking the egg mixture on low speed, slowly stream in the slightly cooled melted chocolate and butter mixture. Mix just until fully combined into a homogeneous batter.
- In a small bowl, whisk together the all-purpose flour, dark cocoa powder, espresso powder, and kosher salt. Pour this dry mixture into the wet batter.
- Using a rubber spatula, gently fold the ingredients together using a sweeping “J” motion. Stop folding the absolute second you no longer see streaks of dry flour to avoid overmixing.
- Pour the batter into a metal 8×8-inch baking pan lined with parchment paper, allowing excess paper to hang over the edges. Smooth the top with the spatula.
- Bake in a preheated 350°F (175°C) oven for 28 to 35 minutes. Remove when the edges are set and a toothpick inserted into the center comes out coated in thick, moist, gooey crumbs.
- Place the pan on a wire rack and allow the brownies to cool completely in the pan before lifting them out by the parchment paper and slicing.
Notes
- Always use a metal 8×8-inch baking pan; glass or ceramic pans insulate heat and will alter the baking time, often leading to overbaked edges and raw centers.
- Measure your flour using a digital kitchen scale for the most accurate, fudgy results. If using cups, fluff the flour, spoon it into the cup, and level it off.
- Do not rush browning the butter; wait for the popping to stop and the nutty aroma to emerge, but remove it from the heat immediately to prevent burning.
- Room temperature eggs are crucial for creating the aerated meringue-like foam that forms the signature crinkly top crust.
- Vigorously whisk the eggs and sugar for at least 2 to 3 full minutes until pale and doubled in volume to ensure a glossy surface.
- When adding the dry ingredients, stop folding the exact moment the flour streaks disappear to prevent gluten development and tough, rubbery brownies.
- Rely on visual cues for doneness, not just time. The center should still be slightly soft and gooey, as the brownies will continue to set in the hot pan after being removed from the oven.
- Allow the brownies to cool completely at room temperature before slicing; cutting them while hot will cause them to collapse.
- For exceptionally clean, bakery-style slices, chill the completely cooled pan in the refrigerator for one hour before cutting, and wipe your knife clean with a damp paper towel between every single cut.
- Store leftovers in an airtight container at room temperature for up to 4 days, or wrap individual squares tightly in plastic wrap and freeze in a heavy-duty bag for up to 3 months.


 Recipe")