


Introduction
When you simply cannot choose between a fudgy brownie and a chewy chocolate chip cookie, the answer is always brookies. This beloved brownie cookie hybrid has taken the baking world by storm, and for good reason. Imagine biting into a bar that delivers the rich, dense chocolate intensity of a brownie on top, while the bottom layer offers the buttery, golden sweetness of a classic chocolate chip cookie. That is exactly what this brookie recipe delivers, and it does so with spectacular results every single time.
I developed this homemade brookies recipe after years of testing different ratios, techniques, and ingredients. The goal was simple: create the best brookies recipe that balances both layers perfectly without one overpowering the other. What you will find here is a recipe that produces soft brookies with a tender cookie base and a gloriously fudgy brownie top. These brownie cookie bars are made entirely from scratch, which means you control the quality and can taste the difference in every bite.
 Recipe")
Whether you are a beginner baker looking for an impressive yet approachable dessert or an experienced home baker searching for your new signature treat, this brookie recipe will become a permanent fixture in your collection. Let me walk you through everything you need to know to achieve brookie perfection.
Why You Will Love This Recipe
- Creates the perfect balance between fudgy brownie and chewy cookie textures
- Made completely from scratch with no box mixes required
- Uses pantry staples you likely already have on hand
- Impressive enough for parties yet simple enough for weeknight baking
- Yields generous brookie bars that satisfy serious chocolate cravings
- The recipe is forgiving and works well for bakers of all skill levels
- Each layer bakes together seamlessly without separating
- The flavor combination is more satisfying than either dessert alone
- These chocolate brookies stay fresh for days when stored properly
- Perfect for gifting, potlucks, bake sales, and holiday dessert tables
 Recipe")
What Makes This Recipe Special
Many brookie recipes struggle with a common problem: the cookie layer either underbakes while the brownie cooks through, or the brownie becomes dry by the time the cookie is done. This recipe solves that issue through careful ingredient ratios and precise technique. The cookie brownie bars bake evenly because the cookie dough layer is pressed thin enough to cook through while remaining soft and chewy, and the brownie batter is formulated to stay fudgy even after full baking.
Another factor that sets this recipe apart is the depth of chocolate flavor in the brownie layer. Rather than relying on melted chocolate alone, this recipe uses high-quality cocoa powder combined with melted butter to create an intensely chocolatey brownie that stays moist and rich. The cookie base uses real butter and both brown and white sugars to develop that signature chewy texture with caramelized edges.
This is not a shortcut recipe. It is a properly developed homemade brookies formula designed to produce professional bakery results in your home kitchen. Every measurement and instruction serves a purpose in delivering the best brookies you have ever tasted.
 Recipe")
Taste and Texture
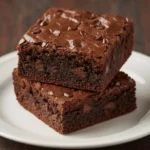
The eating experience of a well-made brookie is something truly special. When you take your first bite, you encounter the brownie layer first. It should be fudgy and dense with a slightly crackly top, delivering deep chocolate flavor that coats your palate. As you continue through the bar, the texture transitions into the cookie layer below. Here you find a completely different experience: buttery, chewy, and studded with pockets of melted chocolate chips that create little rivers of chocolate throughout.
The contrast between the two layers is what makes brookies so addictive. The brownie brings richness and intensity, while the cookie provides sweetness, butteriness, and textural interest. Together, they create a brownie cookie experience that is greater than the sum of its parts. The edges of the pan develop a slightly crispier texture, while the center pieces remain supremely soft and tender.
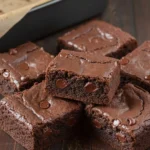
When cooled properly, these brookie bars slice cleanly and hold their shape beautifully. The crumb is tender but structured enough that the bars do not crumble when you pick them up. Each piece delivers that perfect ratio of chocolate to butter to sugar that makes desserts truly memorable.
Ingredients
For the Cookie Layer:
- 1/2 cup (113g) unsalted butter, softened to room temperature
- 1/2 cup (100g) packed light brown sugar
- 1/4 cup (50g) granulated white sugar
- 1 large egg, at room temperature
- 1 teaspoon pure vanilla extract
- 1 1/4 cups (156g) all-purpose flour
- 1/2 teaspoon baking soda
- 1/2 teaspoon fine sea salt
- 1 cup (170g) semisweet chocolate chips
For the Brownie Layer:
- 1/2 cup (113g) unsalted butter, melted and slightly cooled
- 1 cup (200g) granulated white sugar
- 2 large eggs, at room temperature
- 1 teaspoon pure vanilla extract
- 1/3 cup (28g) unsweetened cocoa powder
- 1/2 cup (63g) all-purpose flour
- 1/4 teaspoon baking powder
- 1/4 teaspoon fine sea salt
If you need to convert ingredient measurements, adjust baking temperatures, or switch between US and metric units, use our complete baking measurement conversion calculator.
 Recipe")
Optional Add-Ins and Substitutions
- Nuts: Fold 1/2 cup chopped walnuts or pecans into the brownie batter for added crunch
- Extra chocolate: Press additional chocolate chips into the top of the brownie layer before baking
- Sea salt finish: Sprinkle flaky sea salt over the brownie layer immediately after removing from the oven
- Peanut butter swirl: Dollop tablespoons of creamy peanut butter over the brownie layer and swirl with a knife before baking
- Espresso powder: Add 1 teaspoon of instant espresso to the brownie batter to intensify the chocolate flavor
- White chocolate chips: Substitute half of the semisweet chips in the cookie layer for white chocolate chips
- Gluten-free flour: Replace all-purpose flour with a 1:1 gluten-free baking blend in both layers
- Dark chocolate: Use Dutch-process cocoa powder for a deeper, more sophisticated chocolate flavor
- Caramel: Drizzle salted caramel sauce over cooled brookies for a decadent finish
 Recipe")
Baking Science Behind This Recipe
Understanding why each ingredient matters will help you achieve the best brookies every time and troubleshoot if something goes wrong.
The cookie layer relies on the combination of brown sugar and white sugar to achieve the perfect texture. Brown sugar contains molasses, which adds moisture and creates a chewy, tender crumb. White sugar contributes to spread and creates slightly crispier edges. The ratio used in this recipe produces soft cookies that remain tender even after the extended baking time required for the brownie layer to set.
Baking soda serves as the leavening agent in the cookie layer. It reacts with the acidic molasses in brown sugar to create lift and spread. Too much baking soda would cause the cookies to spread excessively and taste metallic, while too little would result in dense, flat cookies. The measured amount here is calibrated to work within the brookie context.
The brownie layer uses a different approach. Melted butter rather than softened butter creates that dense, fudgy texture characteristic of the best brownies. The higher ratio of sugar to flour keeps the brownie moist and creates that desirable shiny, crackly top. Cocoa powder provides intense chocolate flavor without adding extra fat that could make the brownies greasy.
Baking powder in the brownie layer provides just enough lift to prevent the brownies from becoming too dense, but the small amount keeps them firmly in fudgy territory rather than cakey. The two eggs provide structure and richness while binding everything together.
When layered and baked together, the cookie layer insulates slightly from the bottom heat, allowing both layers to cook at compatible rates. The brownie layer protects the cookie from drying out during the extended bake time.
How to Make It
Begin by preheating your oven to 350°F (175°C). Position a rack in the center of the oven for even heat distribution. Grease a 9×13-inch baking pan with butter or nonstick spray, then line it with parchment paper, leaving overhang on two sides for easy removal later. This preparation ensures your brookies release cleanly and slice beautifully.
 Recipe")
Prepare the cookie layer first. In a large mixing bowl, combine the softened butter, brown sugar, and white sugar. Beat with an electric mixer on medium speed until the mixture becomes light and fluffy, about 2 to 3 minutes. You will notice the color lighten and the texture become creamy. This step incorporates air and dissolves the sugars for a smoother dough.
 Recipe")
Add the egg and vanilla extract to the butter mixture. Beat on medium speed until fully combined and the mixture looks smooth and slightly glossy, about 1 minute. Scrape down the sides of the bowl to ensure everything incorporates evenly.
 Recipe")
In a separate bowl, whisk together the flour, baking soda, and salt. This dry ingredient mixture should be uniform with no visible clumps of baking soda. Add the dry ingredients to the wet ingredients in two additions, mixing on low speed just until the flour disappears. Overmixing at this stage would develop too much gluten and make your cookies tough rather than chewy.
 Recipe")
Fold in the chocolate chips using a spatula or wooden spoon until they distribute evenly throughout the dough. Transfer the cookie dough to your prepared pan and press it into an even layer using your fingertips or the back of a measuring cup. The dough should cover the entire bottom of the pan uniformly. Take your time with this step because an uneven cookie layer leads to uneven baking.
 Recipe")
Now prepare the brownie layer. In a medium saucepan, melt the butter over low heat or microwave it in a heatproof bowl. Allow it to cool for about 5 minutes so it does not scramble the eggs when combined. Cooling the butter slightly also helps create that signature crackly brownie top.
 Recipe")
Add the sugar to the melted butter and whisk until combined. The mixture will look grainy at this point, which is expected. Add the eggs one at a time, whisking well after each addition. The batter should become smoother and slightly thicker. Stir in the vanilla extract.
 Recipe")
Sift the cocoa powder directly into the bowl to prevent lumps. Whisk until the cocoa fully incorporates and the batter turns a rich, dark brown. In a small bowl, whisk together the flour, baking powder, and salt, then add this mixture to the brownie batter. Stir with a spatula until just combined and no dry streaks remain. The batter should be thick but pourable.
 Recipe")
Pour the brownie batter over the cookie dough layer in the pan. Use an offset spatula or the back of a spoon to spread it evenly to all edges. Work gently to avoid disturbing the cookie layer beneath. The brownie layer should completely cover the cookies with no gaps.
 Recipe")
Place the pan in the preheated oven and bake for 28 to 35 minutes. The brookies are done when the brownie top appears set and slightly crackly, and a toothpick inserted into the center comes out with a few moist crumbs clinging to it. Avoid overbaking, as this will dry out both layers and compromise that fudgy, chewy texture you want.
 Recipe")
Remove the pan from the oven and place it on a wire cooling rack. Allow the brookies to cool completely in the pan, which takes about 2 hours. Cooling completely is essential for clean slicing and allows the layers to set properly. Cutting too early results in crumbly, messy bars.
 Recipe")
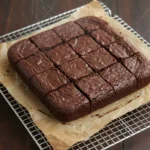
Once cooled, use the parchment overhang to lift the entire slab from the pan. Place it on a cutting board and use a sharp knife to slice into bars. For the cleanest cuts, wipe the knife blade between slices. You should get approximately 20 generous bars from a 9×13-inch pan.
Baking Tools and Equipment
- 9×13-inch baking pan: A light-colored metal pan produces the most even baking results
- Parchment paper: Essential for easy removal and clean slicing
- Electric hand mixer or stand mixer: Makes creaming the butter and sugar efficient
- Mixing bowls: At least two large bowls and one medium bowl
- Whisk: For combining dry ingredients and brownie batter
- Rubber spatula: Ideal for folding and scraping bowls
- Offset spatula: Helpful for spreading layers evenly
- Wire cooling rack: Promotes air circulation for proper cooling
- Sharp chef’s knife: For clean, attractive slices
Each baking tool listed above was carefully selected for consistent results. Click any product name to explore trusted kitchen essentials.
 Recipe")
How to Know It Is Done
Determining doneness with brookies requires attention to a few key indicators since two different batters bake simultaneously. First, look at the brownie surface. It should appear matte rather than wet and shiny, with subtle cracks forming across the top. The edges will pull slightly away from the pan sides.
Perform the toothpick test by inserting a wooden toothpick into the center of the pan, pushing through both layers. When you remove it, you want to see a few moist crumbs clinging to the toothpick. Completely clean means overbaked, while wet batter means more time is needed.
The brookies should feel set when you gently shake the pan. A slight jiggle in the very center is acceptable, as residual heat will continue cooking the bars as they cool. The aroma should be intensely chocolatey with notes of butter and vanilla.
Typically, these brownie cookie bars bake in 28 to 35 minutes, but every oven varies. Start checking at 25 minutes and continue monitoring until you see the proper signs of doneness.
Common Mistakes to Avoid
- Cutting before fully cooled: Patience is essential; cutting warm brookies results in messy, crumbly bars that fall apart
- Overbaking: This creates dry, cakey brownies and crispy cookies instead of fudgy and chewy textures
- Uneven cookie layer: Take time to press the dough uniformly so both layers bake at the same rate
- Using cold eggs: Room temperature eggs incorporate better and create smoother batters
- Overmixing the cookie dough: Stop mixing as soon as the flour disappears to maintain tender texture
- Skipping the parchment paper: Without it, the brookies may stick and break when removing from the pan
- Using dark baking pans: Dark pans absorb more heat and can cause the edges to overbake
- Opening the oven too frequently: This causes temperature fluctuations that affect baking consistency
- Substituting margarine for butter: Real butter provides superior flavor and texture in both layers
 Recipe")
Storage and Freezing
- Store brookies in an airtight container at room temperature for up to 5 days
- Place a piece of parchment paper between stacked layers to prevent sticking
- For softer bars, add a slice of white bread to the container; it absorbs dry air and keeps the brookies tender
- Refrigerate in hot weather or if your kitchen runs warm; bring to room temperature before serving for best texture
- To freeze baked brookies, wrap individual bars in plastic wrap, then place in a freezer-safe container for up to 3 months
- Thaw frozen brookies at room temperature for about an hour before enjoying
- You can also freeze the unbaked cookie dough and brownie batter separately in airtight containers for up to 2 months
- Thaw frozen dough and batter overnight in the refrigerator before assembling and baking
Flavor Variations
- Peppermint Brookies: Add 1/2 teaspoon peppermint extract to the brownie batter and top with crushed candy canes after baking
- S’mores Brookies: Press graham cracker pieces into the cookie layer and top baked bars with toasted marshmallows
- Double Chocolate: Use chocolate chip cookie dough made with cocoa powder for an all-chocolate experience
- Salted Caramel: Drizzle caramel sauce over cooled brookies and sprinkle with flaky sea salt
- Peanut Butter Cup: Add chopped peanut butter cups to the cookie layer and swirl peanut butter into the brownie batter
- Mint Chocolate: Use mint chocolate chips in the cookie layer for a refreshing twist
- Mocha: Add 2 teaspoons instant espresso powder to the brownie batter for coffee lovers
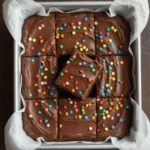
- Birthday Cake: Add rainbow sprinkles to the cookie dough for a festive celebration version
- Turtle: Top cooled brookies with caramel drizzle, melted chocolate, and chopped pecans
Expert Tips
- Room temperature ingredients matter: Butter and eggs at room temperature cream better and create superior texture
- Invest in quality cocoa powder: The brownie layer relies heavily on cocoa, so use the best you can afford
- Press the cookie layer thin: A thinner cookie layer bakes more evenly under the brownie
- Cool the melted butter: This prevents cooking the eggs and helps develop the crackly brownie top
- Use a scale for accuracy: Measuring by weight ensures consistent results every time you bake
- Line your pan properly: Parchment with overhang makes removal effortless and slicing cleaner
- Resist the urge to cut early: Fully cooled brookies slice into perfect bars without crumbling
- Wipe your knife between cuts: A clean blade produces the most attractive presentation
- Store at room temperature: Refrigeration can make the cookie layer firm; room temperature keeps them soft
- Warm leftovers briefly: Ten seconds in the microwave revives the fresh-baked taste and gooey texture
 Recipe")
Frequently Asked Questions
1. What are brookies?
Brookies are a hybrid dessert that combines two beloved American treats: brownies and chocolate chip cookies. The concept is simple but brilliant. A layer of chocolate chip cookie dough forms the base, and a layer of brownie batter goes on top. When baked together, the two layers fuse into one cohesive bar that delivers the best qualities of both desserts. You get the buttery, chewy texture of a cookie and the rich, fudgy intensity of a brownie in every single bite. They are sometimes called brownie cookies, cookie brownie bars, or brookie bars, but they all refer to this same irresistible combination.
2. Can you freeze brookies?
Yes, brookies freeze exceptionally well, making them a great make-ahead dessert option. For baked brookies, allow them to cool completely, then wrap individual bars tightly in plastic wrap. Place the wrapped bars in a freezer-safe container or zip-top bag, removing as much air as possible. Frozen brookies maintain quality for up to three months. When ready to enjoy, thaw at room temperature for about an hour or warm briefly in the microwave for that fresh-baked experience. You can also freeze the unbaked cookie dough and brownie batter separately in airtight containers, thawing overnight in the refrigerator before assembling and baking.
3. Why are my brookies dry or overbaked?
The most common cause of dry brookies is overbaking. Because you are baking two different batters together, timing becomes critical. Start checking for doneness at 25 minutes and remove the pan from the oven when a toothpick inserted in the center comes out with moist crumbs, not completely clean. Another factor is oven temperature accuracy; consider using an oven thermometer to verify your oven runs at the correct temperature. Using too much flour in either layer can also cause dryness, so measure carefully or use a kitchen scale. Finally, ensure your butter is properly softened for the cookie layer and adequately cooled for the brownie layer.
4. How do you store brookies to keep them soft?
To keep your brookies soft and chewy, store them in an airtight container at room temperature for up to five days. A helpful trick is to add a slice of white bread to the container. The bread absorbs dry air and releases moisture back into the bars, keeping them tender longer. Avoid refrigerating unless absolutely necessary, as cold temperatures can firm up the cookie layer and affect the texture. If you do refrigerate, bring the brookies to room temperature before serving. For longer storage, freezing maintains quality better than refrigeration.
5. Can I use a box brownie mix for brookies?
While you certainly can use a box brownie mix for convenience, this from scratch recipe produces superior results. Homemade brownie batter allows you to control the fudgy texture and chocolate intensity, and it typically contains higher quality ingredients than most mixes. If you do choose to use a mix, prepare it according to package directions and spread it over the cookie layer as instructed. You may need to adjust baking time slightly, and the texture might differ from the perfectly calibrated layers this recipe achieves.
6. How thick should each layer be?
For optimal results, the cookie dough layer should be approximately 1/4 inch thick when pressed into the pan. This thinness ensures the cookie bakes through completely while remaining chewy. The brownie layer should be slightly thicker, about 1/2 inch, to maintain that characteristic fudgy density. Together, the finished brookies should be about 3/4 to 1 inch tall, providing substantial bars with well-defined layers that bake evenly throughout.
Related Recipes From Our Kitchen
- Cosmic Brownies Recipe: These nostalgic brownies feature a rich, fudgy base topped with chocolate ganache and colorful candy-coated chocolate pieces, perfect for anyone who loves intensely chocolatey treats
- Fudgy Homemade Brownies: Our classic brownie recipe delivers maximum chocolate flavor with a dense, moist texture that brownie purists adore
- Homemade Brownie Recipe: A versatile base brownie recipe that adapts easily to various add-ins and toppings while maintaining perfect fudgy consistency
Final Notes
Making brookies at home is one of those baking projects that delivers tremendous reward for relatively modest effort. When you pull that pan from the oven and see the beautiful crackly brownie top concealing a chewy chocolate chip cookie base, you will understand why this brownie cookie combination has captured so many hearts.
This brookie recipe represents my best work in developing a formula that balances both layers perfectly. The fudgy brownie layer stays moist and intensely chocolatey, while the cookie base remains soft and buttery with those perfect pockets of melted chocolate chips. Together, they create something greater than either dessert achieves alone.
Whether you are making these homemade brookies for a special occasion, a casual gathering, or simply because you deserve something wonderful, I am confident this recipe will exceed your expectations. Take your time with the technique, trust the process, and resist cutting into them before they cool completely. Your patience will be rewarded with bars that look as impressive as they taste.
Once you master this brookie recipe, it will become your answer whenever someone asks what you should bring to a party. These brownie cookie bars travel well, please crowds universally, and showcase your baking skills beautifully. Welcome to the world of brookies, where you never have to choose between your two favorite desserts again.
 Recipe")
Brookies (Brownie Cookies) Recipe
Ingredients
Equipment
Method
- Preheat oven to 350°F (175°C) and line a 9×13-inch baking pan with parchment paper overhang.
- Beat softened butter, brown sugar, and 1/4 cup white sugar for 2 to 3 minutes until light and fluffy.
- Add 1 egg and 1 teaspoon vanilla; beat for 1 minute until smooth and glossy.
- Whisk 1 1/4 cups flour, baking soda, and 1/2 teaspoon salt, then fold into the wet cookie mixture.
- Fold in the chocolate chips and press the dough evenly into the bottom of the prepared pan.
- In a separate bowl, whisk melted butter and 1 cup white sugar together.
- Whisk in 2 eggs (one at a time) and 1 teaspoon vanilla until smooth.
- Sift in cocoa powder and stir, then fold in 1/2 cup flour, baking powder, and 1/4 teaspoon salt.
- Pour the brownie batter over the cookie layer and spread evenly to the edges with an offset spatula.
- Bake for 28 to 35 minutes until the brownie top is set and a toothpick yields moist crumbs.
- Transfer the pan to a wire rack and let cool completely for 2 hours to set the layers.
- Use the parchment paper to lift the bars from the pan and slice into 20 squares with a sharp knife.
Notes
- Do not slice the bars warm; cooling for 2 hours is essential to prevent crumbling.
- Pull the bars when a toothpick inserted has moist crumbs; completely clean means they are overbaked.
- Press the cookie dough into a completely flat, uniform sheet so the layers bake evenly.
- Ensure your eggs and softened butter are at room temperature for smooth emulsions.
- Use a kitchen scale for flour and sugar measurements to guarantee accurate, fudgy results.
- Overmixing the cookie flour activates gluten, making the base tough instead of chewy.
- Store bars at room temperature in an airtight container with a slice of bread to maintain softness.
- Use light-colored metal pans, as dark pans absorb excess heat and burn the edges.
- Wipe your knife blade clean with a warm towel between each slice for sharp bakery aesthetics.
- To freeze, wrap individual cooled bars in plastic wrap and store in a container for up to 3 months.
- Calories: 265 kcal
- Carbohydrates: 35 g
- Protein: 3 g
- Fat: 13 g
- Saturated Fat: 8 g
- Sugar: 23 g
- Fiber: 2 g
- Sodium: 150 mg
- Cholesterol: 55 mg


 Recipe")