


Introduction
If there is one loaf that can completely change how you feel about baking bread at home, it is this no knead artisan bread. It looks like something you would carry home from a neighborhood bakery with a crackling crust, a chewy center, and those beautiful irregular air pockets that make every slice feel special. Yet the method is surprisingly simple, which is exactly why this crusty bread recipe has become such a trusted classic for beginner bakers and experienced home bread makers alike. You do not need a mixer, you do not need advanced shaping skills, and you definitely do not need to spend your afternoon kneading dough on the counter.
What makes this easy homemade bread so satisfying is the contrast between effort and reward. You stir together a soft, sticky dough in just a few minutes, leave it alone while the yeast works, and then bake it in a blazing hot pot that creates a bakery-style oven spring. The result is a loaf that sounds hollow when tapped, shatters slightly when sliced, and smells warm, wheaty, and just a little sweet from fermentation. This is the kind of bread that makes a bowl of soup feel cozier, a sandwich taste better, and a plain swipe of salted butter feel luxurious.

For best blog performance and visual engagement, place a hero image directly under this introduction showing the fully baked loaf on a cooling rack with crumbs scattered nearby. Use this ALT text: no knead artisan bread with crispy golden crust cooling on a rack. Add a second process photo after the ingredients section showing the wet dough just after mixing, and a third image after the baking steps showing the loaf being lifted out of the pot. Those images help readers feel confident about dough texture, encourage longer page time, and make this recipe especially strong for Pinterest saves.
Why This Recipe Works
- No knead artisan bread relies on a high-hydration dough, which means the extra moisture helps gluten form naturally as the dough rests.
- A long rest gives the yeast time to build flavor, so the loaf tastes more developed than many quick bread recipes.
- Baking in a preheated covered pot traps steam, which helps the loaf rise before the crust fully sets.
- The dough is forgiving, which makes this an excellent beginner bread recipe for home bakers who are nervous about yeast.
- The ingredient list is short and pantry-friendly, yet the finished loaf delivers real bakery-style texture.
- You can bake the dough the same day or refrigerate it for a deeper, more complex flavor.
- This artisan bread recipe works beautifully for soup nights, toast, sandwiches, crostini, and simple buttered slices.

What Makes This Recipe Special
A lot of bread recipes promise simplicity, but this no knead bread truly delivers it without sacrificing the things people love most about artisan loaves. The crust bakes up thick and golden with natural cracks and ridges that look rustic instead of overly polished. Inside, the crumb stays tender and pleasantly chewy, which gives each bite substance without becoming heavy. Because the dough is mixed rather than kneaded, this method feels approachable on a busy weekday or relaxed weekend morning. It is the kind of recipe that turns flour, water, salt, and yeast into something that feels almost a little magical.
Another reason this loaf stands out is how flexible it is in real kitchens. Some days you may want to mix the dough in the morning and bake at dinner, while other days you may want to refrigerate it overnight and wake up to fresh bread. That flexibility is one of the reasons home bakers return to no knead artisan bread again and again. The dough does not demand constant attention, yet it rewards patience with better flavor and stronger structure. Once you understand the feel of the dough and the look of a properly risen loaf, you gain a bread-baking rhythm that becomes second nature.
This recipe also teaches important bread principles in a very practical way. You learn how hydration affects crumb, how steam affects crust, and how fermentation affects flavor without needing to study advanced techniques. That makes this loaf more than just a recipe; it becomes a useful foundation for future bread projects. If you later move on to focaccia, sandwich bread, or naturally leavened dough, the lessons from this easy homemade bread still apply. Good bread baking is often about repetition and observation, and this loaf gives you both in a friendly format.

Taste & Texture Results
- The crust is deeply golden, blistered in places, and pleasantly crisp with that signature bakery crackle.
- The center is moist, open, and chewy, which is exactly what people expect from a great artisan bread recipe.
- The flavor is mild at first bite, then fuller and more developed as the yeast and flour notes come through.
- Refrigerating the dough creates an even richer taste with a slight complexity that reminds many bakers of sourdough.
- Sliced warm, this no knead artisan bread tastes rich and comforting with butter, olive oil, or a swipe of soft cheese.
- Toasted the next day, it becomes nutty, crisp-edged, and perfect for breakfast or sandwiches.
Ingredients
- 3 cups bread flour
- 2 teaspoons instant yeast
- 1 1/2 teaspoons kosher salt
- 1 1/2 cups warm water
- 1 tablespoon flour, for dusting and shaping
If you need to convert ingredient measurements, adjust baking temperatures, or switch between US and metric units, use our complete baking measurement conversion calculator.

When ingredients are this simple, quality matters more than ever. Bread flour gives the loaf a stronger structure and a chewier interior because it contains more protein than all-purpose flour. Instant yeast blends directly into the dry ingredients and keeps this crusty bread recipe wonderfully easy, while warm water wakes up the yeast and helps everything come together quickly. Salt does far more than season the dough; it sharpens flavor, strengthens gluten, and helps the bread taste complete rather than flat. Even that small amount of extra flour for shaping plays an important role because it lets you handle the sticky dough without turning it dry or dense.
Optional Add-Ins & Substitutions
- Swap bread flour for all-purpose flour if needed, knowing the loaf may be slightly less chewy and a bit softer in structure.
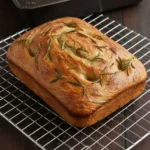
- Add 1 tablespoon chopped fresh rosemary for an herby variation that pairs beautifully with soup and olive oil.
- Stir in 1/2 cup shredded sharp cheddar for a richer loaf with toasted cheesy edges.
- Mix in 1 tablespoon everything bagel seasoning for a savory crust with extra texture.
- Add 1 teaspoon cracked black pepper for a subtle warmth that works especially well with cheese boards.
- Replace 1/2 cup of the bread flour with whole wheat flour for a slightly heartier flavor.
- Fold in 1/3 cup chopped olives or sun-dried tomatoes for a more Mediterranean-style loaf.
Substitutions work best when they respect the dough’s moisture level. If you add dry ingredients like seeds or whole wheat flour, the dough may need an extra splash of water to stay soft and sticky. If you add moist ingredients like olives, use a light hand so the dough does not become overly slack. The best no knead bread stays a little loose and tacky because that moisture helps create those airy pockets inside the loaf. Whenever you make changes, watch the dough rather than the clock and trust visual cues over rigid perfection.

Baking Science Behind This Recipe
The brilliance of no knead artisan bread comes from the way time replaces physical kneading. In traditional bread recipes, kneading organizes gluten strands by force, creating the structure needed to trap gas from the yeast. In this method, the dough contains enough water that the gluten develops gradually on its own while the dough rests. As the yeast ferments, it releases carbon dioxide, and that gas stretches the developing gluten network from the inside. This is why the dough looks bubbly, loose, and lively when it is ready to shape.
Hydration is one of the biggest reasons this artisan bread recipe bakes up with an open crumb. A wetter dough moves more freely in the oven, allowing large air pockets to expand before the loaf sets. That same moisture also turns into steam during baking, which improves oven spring and supports a lighter interior texture. The preheated pot adds another layer of science because it traps steam around the bread, much like a professional deck oven would. According to baking guidance from King Arthur Baking, steam in the early phase of baking helps bread rise more fully and contributes to crust development, which is exactly why this method works so well for home bakers.
Salt and fermentation time matter just as much as flour and water. Salt strengthens dough structure and moderates yeast activity, which helps the loaf rise steadily instead of racing too quickly. A longer rest, especially a chilled fermentation, gives enzymes more time to break starches into sugars that deepen flavor and improve browning. That is why refrigerated dough often tastes a little richer and more complex the next day. When you bake this easy homemade bread, you are not simply following steps; you are guiding a series of controlled reactions that turn a few humble ingredients into something remarkably flavorful and beautiful.
Step-by-Step Instructions
In a large mixing bowl, stir together the bread flour, instant yeast, and kosher salt until evenly combined. Pour in the warm water and mix with a wooden spoon or sturdy spatula until you no longer see dry flour. The dough should look shaggy, wet, and sticky rather than smooth or firm, because that soft texture is what helps build an open crumb later. If the dough seems dry and tight, add a small splash of water. If it looks more like batter than dough, add a light dusting of flour until it becomes thick but still very sticky.

Cover the bowl tightly with plastic wrap, a plate, or a reusable lid and let the dough rise at room temperature until doubled and bubbly. In many kitchens this takes about two to three hours, although a cooler room can slow things down and a warm kitchen can speed things up. You are looking for a dough that jiggles slightly when the bowl is moved and has visible bubbles on the surface. That lively look tells you the yeast has done its job and the gluten network has begun forming. The dough should smell pleasantly yeasty and lightly sweet, never harsh or sour at this point.

For deeper flavor, refrigerate the risen dough for at least eight hours or up to three days after the first rise. This optional rest slows the yeast and allows the dough to develop a more complex taste without extra work from you. If you choose this route, take the dough out while the oven preheats so it can lose some of its chill. Colder dough can still bake well, but a slightly warmer dough tends to rise more dramatically in the oven. This flexible schedule is one reason no knead artisan bread fits so easily into home routines.

About thirty minutes before baking, place a Dutch oven with its lid into your oven and preheat to 450 degrees Fahrenheit. Heating the pot thoroughly is essential because the dough needs an intense burst of heat the moment it goes in. That heat helps create oven spring, which is the dramatic early expansion that gives the loaf height and lightness. While the oven preheats, place a sheet of parchment paper on the counter and lightly flour your work surface. These small setup steps make shaping much easier and keep the transfer simple and safe.

Scrape the risen dough onto the floured surface and dust the top lightly with flour. Using a bench scraper or spatula, fold the edges inward several times to create a rough round shape without pressing out all the gas. The goal is not a perfect taut boule, because this no knead bread is meant to look rustic and natural. You just want enough structure to help the loaf hold together when transferred. If the dough sticks a bit, that is perfectly normal and often a sign that your hydration is right where it should be.

Turn the shaped dough seam-side down onto the parchment paper and nudge it into a centered round. Let it rest there briefly while you remove the hot pot from the oven. This short pause gives the dough a moment to settle and makes the loaf easier to lift. The surface may look uneven, soft, and slightly bumpy, and that is exactly the charm of a good artisan bread recipe. Those folds and ridges often become the crackly peaks and valleys that make the crust so irresistible.

Carefully lift the dough by the parchment paper and lower it into the hot Dutch oven. Cover the pot immediately and place it back in the oven so the trapped steam can begin working right away. Bake covered for 30 minutes, which allows the loaf to expand before the crust hardens. Then remove the lid and bake for another 10 to 15 minutes until the bread is deeply golden brown. The finished loaf should look bold and burnished rather than pale, because color equals flavor when it comes to crusty bread.

Transfer the baked loaf to a cooling rack and let it rest for at least ten minutes before slicing. This part feels hard because the bread smells incredible, but the interior is still setting as it cools. If you cut too soon, the crumb can seem slightly gummy even if the loaf is fully baked. Waiting allows steam to redistribute and the texture to settle into that chewy, airy balance you want. Once sliced, your no knead artisan bread should reveal a glossy crumb, irregular holes, and a crust that crackles under the knife.
Baking Tools & Equipment
- Large mixing bowl
- Wooden spoon or sturdy spatula
- Bench scraper or flexible dough scraper
- Parchment paper
- Dutch oven with lid
- Cooling rack
- Sharp bread knife or serrated knife
- Measuring cups and measuring spoons
“Each baking tool listed above was carefully selected for consistent results. Click any product name to explore trusted kitchen essentials.”

Good tools do not have to be expensive, but they do make bread baking smoother and more consistent. A large bowl gives the dough room to rise without threatening to overflow, while a sturdy spoon helps you combine the sticky mixture thoroughly. A bench scraper is one of the most useful tools for this beginner bread recipe because it lets you shape the dough with control and minimal mess. Parchment paper turns a soft, sticky loaf into something easy to transfer. And of course, the Dutch oven is the key piece that helps this Dutch oven bread develop its exceptional crust and oven spring.
How To Know When Baking Is Done
A well-baked loaf gives several clear signs, and learning them will make every future bread bake easier. First, the crust should be deeply golden brown with darker ridges in a few places rather than softly blond all over. Second, the loaf should feel lighter than it looks when lifted with oven mitts or a sturdy spatula. Third, the bottom should sound hollow when tapped, which tells you the interior structure has set. If you like using a thermometer, the center of the loaf should read around 205 to 210 degrees Fahrenheit for a fully baked result.
The visual cue matters just as much as the temperature. Underbaked bread often looks pale and feels slightly soft at the sides, while a finished crusty bread recipe feels firm and confident all over. The scent becomes deeper too, moving from raw flour notes to that rich toasted aroma that fills the kitchen with warmth. If you are ever unsure, it is usually better to give the loaf a few extra minutes uncovered than to pull it too early. A slightly darker crust often tastes wonderful, while an underbaked interior can be disappointing.
Common Mistakes To Avoid
- Using water that is too hot, which can weaken or kill the yeast before the dough even begins rising.
- Adding too much flour during mixing, which creates a tighter dough and reduces those beautiful open holes.
- Expecting the dough to look like a kneaded bread dough, even though this method should stay sticky and loose.
- Skipping the full preheat for the Dutch oven, which can reduce oven spring and crust quality.
- Slicing the loaf too early, which can make the interior seem gummy or underdone.
- Baking the loaf too pale, which leaves flavor behind because crust color is essential in artisan bread recipe development.
- Overhandling the dough during shaping, which can deflate the air pockets you worked so patiently to build.
Mistakes with bread are usually more educational than disastrous. A loaf that spreads slightly can still taste delicious, and a dough that rises slowly may just need a warmer spot. One of the nicest things about no knead artisan bread is that it teaches you to read dough without demanding perfection. The more often you make it, the more quickly you will notice what sticky dough should feel like, how active yeast should look, and when the loaf has developed the right color. Confidence grows fast with a recipe this forgiving.
Storage & Freezing Guide
- Store the cooled loaf at room temperature in a paper bag or loosely wrapped in a clean towel for the first day to preserve crust texture.
- After that, keep it in an airtight container or zip-top bag to prevent the interior from drying out.
- Refresh day-old bread in a hot oven for a few minutes to bring back some crust and warmth.
- Slice and freeze leftovers in a freezer-safe bag for up to 3 months.
- Thaw slices at room temperature or toast directly from frozen for quick use.
- Avoid refrigerating the baked loaf, which can make bread stale faster.
Fresh bread always shines brightest on the day it is baked, but this easy homemade bread holds up very well if stored thoughtfully. The crust naturally softens a bit by the second day, though a few minutes in the oven can wake it right back up. Sliced pieces make excellent toast, grilled cheese, and garlic bread, so leftovers are rarely wasted. If you know you will not finish the loaf promptly, freezing is the smartest move because it protects flavor and texture far better than the refrigerator. A stash of frozen slices means homemade bread is never far away.
Flavor Variations
- Add roasted garlic for a deeper, savory loaf with mellow sweetness in every bite.
- Mix in shredded Parmesan and cracked black pepper for a more robust dinner bread.
- Fold in chopped rosemary and flaky sea salt for a fragrant loaf that feels especially elegant.
- Add cinnamon and raisins for a lightly sweet breakfast version.
- Try toasted walnuts and dried cranberries for a festive, textured variation.
- Sprinkle sesame seeds or everything seasoning on top before baking for extra crunch and visual appeal.
- Use part whole wheat flour for a nuttier flavor and slightly heartier crumb.
Flavor additions are easiest when folded in gently after the first rise or sprinkled over the dough during shaping. That way the base dough remains simple and reliable, and your mix-ins are less likely to interfere with hydration. It is a smart habit to master the classic version first, because once you understand the feel of a successful no knead bread, you can adapt it with confidence. Savory additions tend to work especially well because they highlight the crust and chewiness. Still, lightly sweet variations can be wonderful too, especially toasted and served with butter.
Frequently Asked Questions
1. Can I make no knead artisan bread without a Dutch oven?
Yes, you can absolutely make no knead artisan bread without a Dutch oven, though the crust may be slightly different. Place the shaped dough on a parchment-lined baking sheet or preheated pizza stone, then put a metal pan on a lower rack and fill it carefully with hot water to create steam. That added moisture helps mimic the environment of a covered pot during the first stage of baking. You still want a very hot oven and a deeply golden finish for the best result. The loaf may spread a little more, but it can still bake beautifully with a crisp crust and tender crumb.
2. Why is my dough so sticky?
Sticky dough is expected in this artisan bread recipe, and in fact it is one of the reasons the crumb turns out so airy and open. A high-hydration dough allows gluten to form with minimal kneading and supports larger air pockets during baking. Many new bakers assume they need to keep adding flour until the dough becomes easy to handle, but that change can make the loaf dense. Instead, use a bench scraper, a dusting of flour on the surface, and parchment paper to manage the dough. Once you trust the process, the stickiness starts to feel like a helpful sign rather than a problem.
3. Can I use all-purpose flour instead of bread flour?
Yes, all-purpose flour works very well in this easy homemade bread, especially if that is what you already have in your pantry. Bread flour gives the loaf a bit more chew and structure because of its higher protein content, but all-purpose flour still produces a lovely crusty loaf. You may notice slightly smaller holes and a softer interior, though the bread will still taste excellent. The most important thing is keeping the dough soft and giving it enough time to rise fully. If you are a beginner, using all-purpose flour is still a great way to learn the method.
4. How long can I refrigerate the dough before baking?
You can refrigerate the dough for up to 3 days, which is one of the best features of this no knead artisan bread method. A longer cold rest often creates deeper flavor, better browning, and a more developed aroma in the final loaf. The dough may look puffiest on the first day and somewhat more deflated later, but that is normal and usually not a problem. Let it sit out briefly while the oven and pot preheat so it is not going into the oven ice cold. Many bakers find the overnight version has the best balance of convenience and flavor.
5. Why did my loaf turn out dense instead of airy?
A dense loaf usually points to one of a few common issues. The dough may have been too dry from extra flour, the rise may have been cut short, or the yeast may have been old or weak. Sometimes the loaf also turns dense if it is handled too aggressively during shaping and loses too much of the gas built during fermentation. In this beginner bread recipe, it is important to let the dough stay loose, rise until bubbly, and enter a very hot oven. When those conditions line up, the loaf is much more likely to bake tall, open, and chewy.

Expert Baker Tips
- Use bread flour when possible for the most classic artisan bread recipe texture.
- Aim for a sticky dough, because wetter dough usually means a lighter crumb.
- Warm kitchens speed rising, so watch the dough and not just the clock.
- Refrigerate the dough overnight when you want the best flavor with almost no extra effort.
- Let the loaf bake until richly golden, because color builds both flavor and crunch.
- Cool before slicing to protect the crumb texture.
- Make the recipe several times in a row to learn the dough by feel, which is the fastest path to consistent bread success.
The first time you bake this loaf, take mental notes about texture and appearance. Notice how the dough looks right after mixing, how much it expands during the rise, and how the shaped loaf behaves when transferred. Those details matter more than memorizing any single timing rule because flour, humidity, and room temperature all affect bread. A confident baker is not someone who never adjusts; it is someone who knows how to respond calmly to the dough in front of them. That is exactly why no knead artisan bread is such a rewarding recipe to practice.
Related Recipes From Our Kitchen
- Homemade Pizza Dough Recipe – A dependable dough with great stretch, chewy texture, and a flavorful crust that works beautifully for homemade pizza night.
- Sourdough Bread Recipe – A naturally leavened loaf with deep tangy flavor, crisp crust, and an airy crumb for bakers ready to try a slower fermentation method.
- Banana Bread Recipe – A soft, moist quick bread packed with sweet banana flavor, perfect for breakfast, snacking, or using up ripe bananas.
Final Baking Notes
A loaf of no knead artisan bread proves that outstanding bread does not need to be complicated to feel deeply satisfying. With a handful of pantry staples, a sticky dough, and a hot covered pot, you can create a bakery-style loaf with remarkable crust, chewy texture, and a flavor that tastes far more involved than the method suggests. This recipe is ideal for anyone who wants the comfort of homemade bread without the pressure of advanced shaping or heavy kneading. It fits beautifully into real life, whether you bake it the same day or let the dough rest in the refrigerator until the timing feels right.

No Knead Artisan Bread
Ingredients
Equipment
Method
- In a large mixing bowl, stir together the bread flour, instant yeast, and kosher salt.
- Pour in the warm water and mix with a wooden spoon or sturdy spatula until no dry flour remains and the dough is shaggy, wet, and sticky.
- Cover the bowl tightly and let the dough rise at room temperature until doubled and bubbly, about 2 to 3 hours.
- For deeper flavor, refrigerate the risen dough for at least 8 hours or up to 3 days, then let it sit out while the oven preheats.
- About 30 minutes before baking, place a Dutch oven with its lid in the oven and preheat to 450 degrees Fahrenheit.
- Scrape the dough onto a lightly floured surface and dust the top lightly with flour.
- Using a bench scraper or spatula, fold the edges inward several times to create a rough round shape.
- Turn the shaped dough seam-side down onto parchment paper and gently nudge it into a centered round.
- Carefully lift the dough by the parchment paper and lower it into the hot Dutch oven.
- Cover and bake for 30 minutes.
- Remove the lid and bake for another 10 to 15 minutes until the bread is deeply golden brown.
- Transfer the loaf to a cooling rack and let it cool for at least 10 minutes before slicing.
Notes
- The dough should be wet and sticky, not firm like traditional kneaded bread dough.
- Bread flour gives the loaf better chew and structure, but all-purpose flour can still work if needed.
- Do not add too much extra flour during shaping or the loaf may turn dense instead of airy.
- A long rest improves flavor, so refrigerating the dough overnight can produce a more developed taste.
- Make sure the Dutch oven is fully preheated for strong oven spring and better crust formation.
- If your kitchen is cool, the dough may need a little longer to double and become bubbly.
- The loaf is done when the crust is deeply golden and the bottom sounds hollow when tapped.
- For best texture, wait the full cooling time before slicing so the crumb can finish setting.
- Store the bread at room temperature in a paper bag or loosely wrapped towel the first day for the best crust.
- After the first day, keep leftovers in an airtight container or zip-top bag to prevent drying out.
- Refresh day-old bread in a hot oven for a few minutes to bring back some crust and warmth.
- Slice and freeze the bread for easier thawing and quick toasting later.
- Avoid refrigerating the baked loaf because it can make bread stale faster.
- If the dough seems dry during mixing, add a small splash of water to maintain the proper sticky consistency.
- If the dough looks too loose like batter, add only a light dusting of flour until it becomes thick but still sticky.


